
A startpage, such as the one provided by the application SUI, can help you navigate all your apps with ease. Once you start installing more and more self-hosted applications on your Unraid application server, knowing where they are all located can become quite a challenge. This is especially true if you keep everything local and don’t use unique subdomains for every application.
SUI allows you to create a list of applications you might be self-hosting (though they can be any web app) and a separate list of bookmarks to your favourite websites. I have been testing this application for the past week or so, and this guide will tell you how to set it up on Unraid and configure it using yet another self-hosted application.
Installing SUI on Unraid
It will come as no surprise to you that SUI is installed as a Docker container, of which a template named SUIStartpage is available in the Community Applications under CorneliousJD’s repository. Unless you want to change the port from 8489 to something else, there are no adjustments needed to be made to the template. Just click the installation button, and you are ready to go.
Once installed, you can access the page SUI has created using the browser of your choice by navigating to http://YOU-UNRAID-IP:8489. There is a menu button located in the bottom-left corner, though this will only allow you to choose the theme. The setup of the SUI startpage is done in three JSON files.
Configuring SUI using code-server
Whenever you need to edit a file one of your Unraid server’s Docker containers needs, I recommend using the code-server application. This application allows you to run Visual Studio Code, possibly the best source-code editor around, inside a browser and it won’t have any issues with permissions.
As with the SUI application, code-server can be found in the Community Applications and doesn’t need any edits to the provided template. The only exception is if you are planning on accessing it from the internet. In that case, you will definitely want to set a password.
Editing SUI’s apps.json file
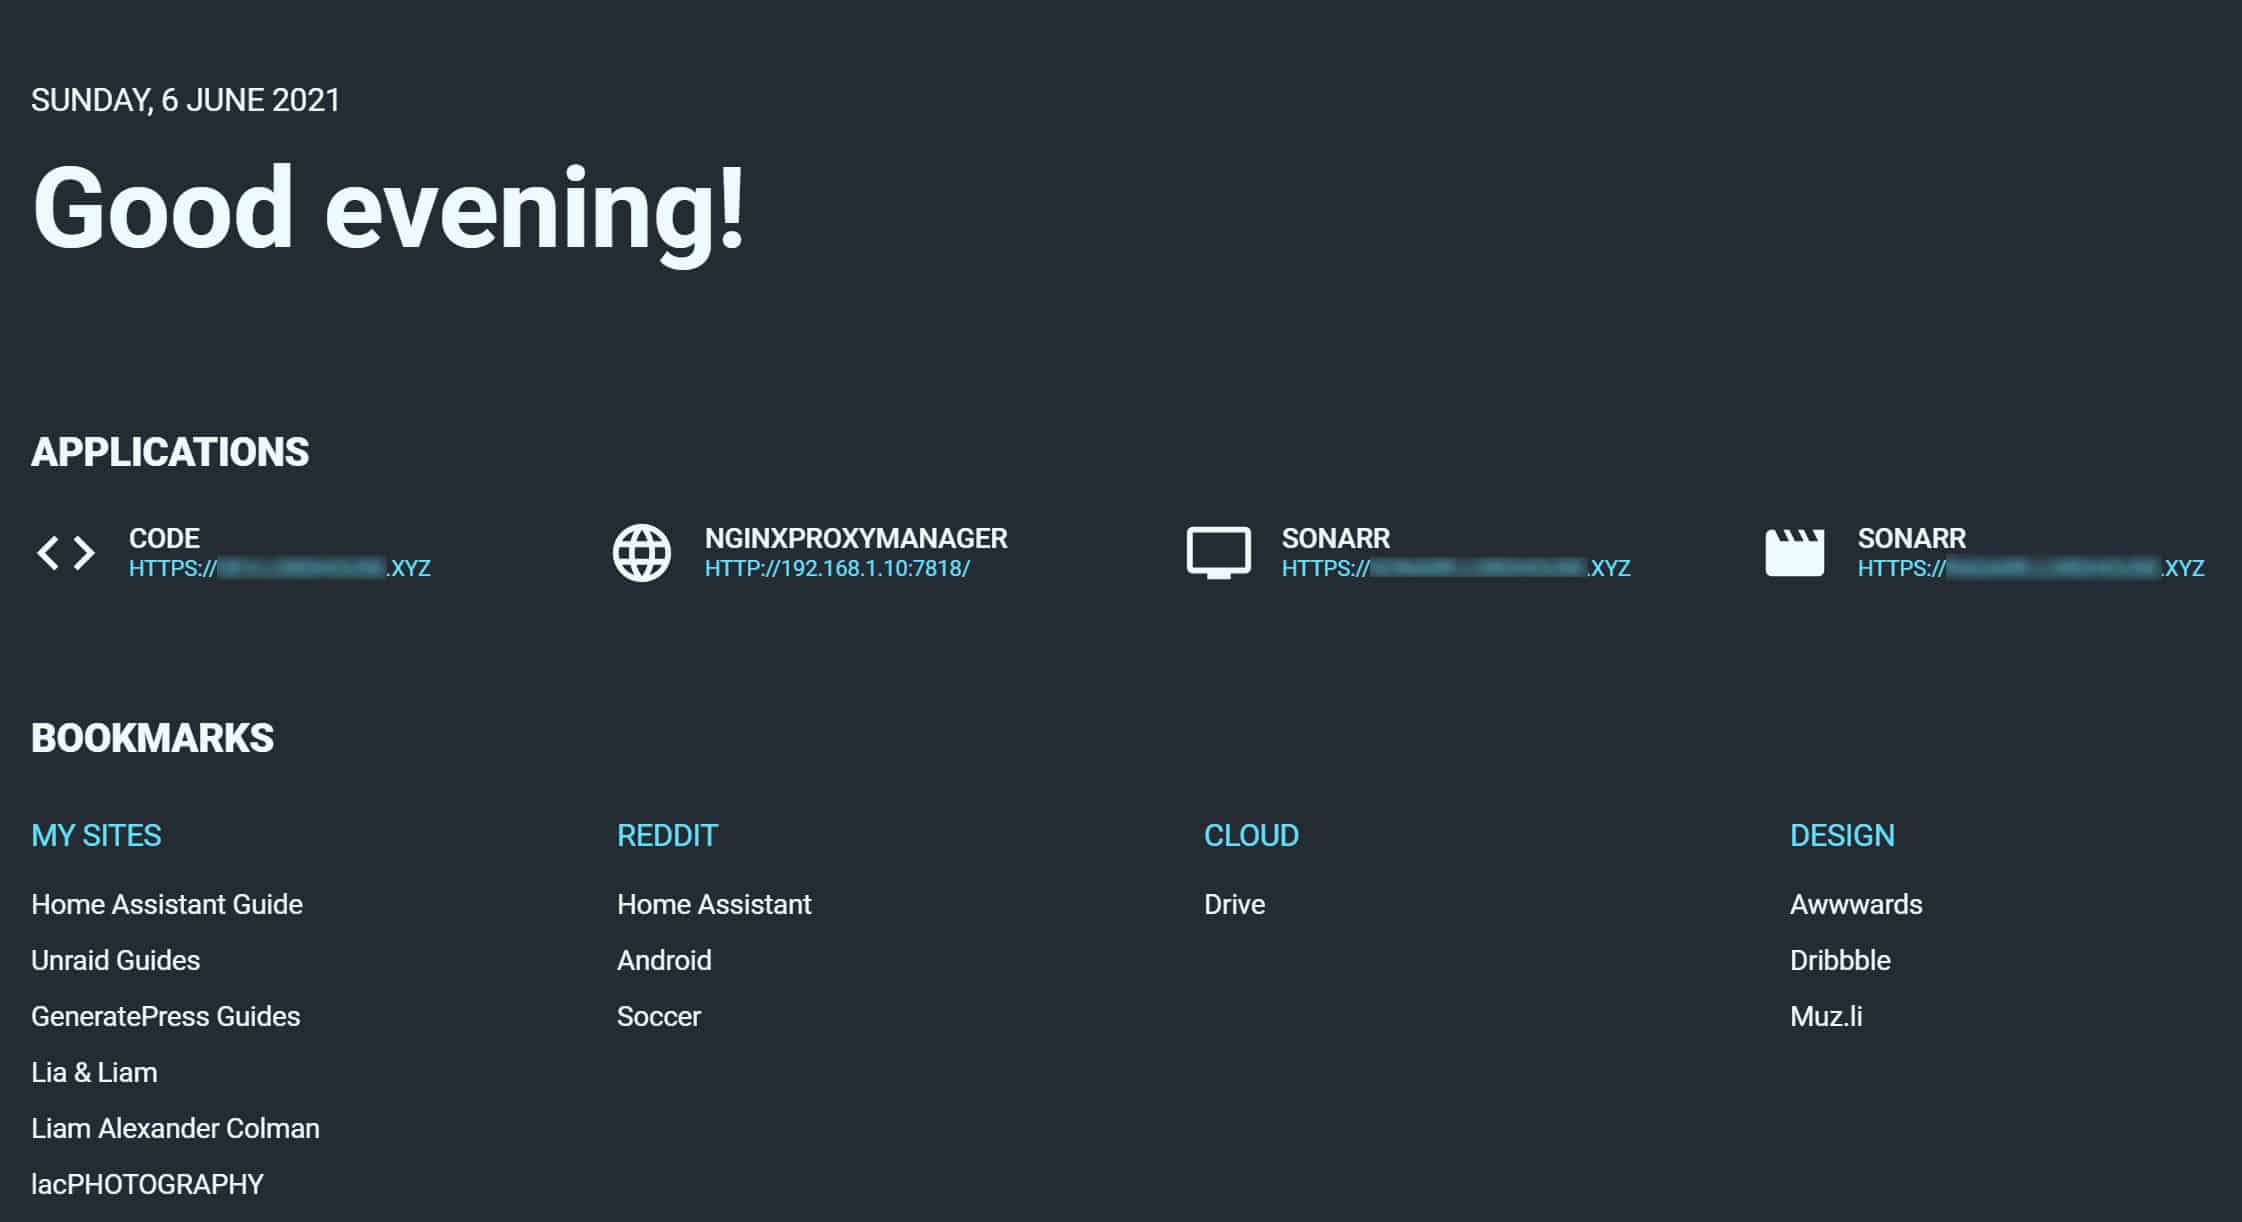
In the first file, found under /mnt/user/appdata/suistartpage/apps.json, you can define what applications you want shown on your SUI startpage. Applications take up more space and have an icon next to their name, making this file perfect to store all of your self-hosted applications.

The contents of this file are easily edited. You add the name and URL, or domain and port, of your application and then choose an icon for the application. SUI supports Material Design Icons, and all you need to enter is the icon’s name.
{
    "apps" : [
        {"name":"Code","url":"https://dev.example.com","icon":"code-tags"},
        {"name":"NginxProxyManager","url":"http://npm.example.com","icon":"web"},
        {"name":"Sonarr","url":"https://sonarr.example.com","icon":"television"},
        {"name":"Sonarr","url":"https://radarr.example.com","icon":"movie"}
    ]
}
The good thing about using code-server for editing is that it will automatically recognize that this is a JSON file by its filename and will point out any errors. For example, it would highlight the comma, were you to place one after the final entry in the array.
Editing SUI’s links.json file
The bookmarks, which are stored in the file /mnt/user/appdata/suistartpage/links.json, are just as easy to edit as the applications. You first define a category, under which the following links will be grouped. Then you simply add one link at a time, providing a name and URL for each option.
{
            "bookmarks" : [
              {
                "category": "My sites",
                "links": [
                  {
                    "name": "Home Assistant Guide",
                    "url": "https://home-assistant-guide.com"
                  },
                  {
                    "name": "Unraid Guides",
                    "url": "http://unraid-guides.com"
                  }
                ]
              },
}
Editing SUI’s providers.json file
The final file, /mnt/user/appdata/suistartpage/providers.json, allows you to search specific websites using a prefix. You might not have noticed it, but at the top of the SUI startpage, there is a single line. As it turns out, that is not just a line but a text field which you can use to search google. Using prefixes, you can search pages directly, without having to first open them.
To add your own search provider, you will first need to figure out the exact URL for a search query. I found the appropriate URL for this website, simply by performing a search. As you can see from the URL in the image below, the correct search URL is https://unraid-guides-com/?s=, as it is with most WordPress-base websites.

To add Unraid Guides to my search providers I would simply amend the following line to the provider.json file:
{
    "providers" : [
        {"name":"Trakt","url":"https://trakt.tv/search?query=","prefix":"/t"},
        {"name":"Unraid Guides","url":"https://unraid-guides.com/?s=","prefix":"/ug"}
    ]
}
I can then search Unraid Guides without having to leave my SUI startpage by adding the prefix /ug to the search field.

Changing the SUI page title
One last adjustment you might want to make is to adjust the page’s title from SUI to something else, for example Home. To do so, open the file /mnt/user/appdata/suistartpage/providers.json and edit the text between the <title> tag.


