
Unraid will let you know, whenever a drive’s S.M.A.R.T. (Self-Monitoring, Analysis, and Reporting Technology) test encounters any errors. You also have the ability of manually checking the health of your drives and executing either a short or extended test. But the fact of the matter is that you need to go digging, to get a proper look at your drives’ health. That is where Scrutiny, an app I consider essential since discovering it, can help out.
Scrutiny will give you an overview over all your hard drives and provide historic data on anything relevant that might have occurred. Or as the developer puts it: “Scrutiny is a hard drive health dashboard and monitoring solution, merging manufacturer provided S.M.A.R.T. metrics with real-world failure rates.”

Installing Scrutiny on Unraid
Before you get to install Scrutiny, you will need to know which drives the application shall monitor. You can either enter the main tab in the Unraid dashboard, and look up the names of your individual drives (sda, sdb, sdc, etc.), or you can execute the following command in a terminal window:
smartctl --scan
This should result in a list of drives appearing. Much like Windows names hard drives C:, D:, and so on, Linux starts with sd, which originally identified a SCSI device, and a letter, signifying the order in which the drive was found. In my case, the terminal reported the following devices:
/dev/sdb -d scsi # /dev/sdb, SCSI device
/dev/sdc -d scsi # /dev/sdc, SCSI device
/dev/sdd -d scsi # /dev/sdd, SCSI device
/dev/sde -d scsi # /dev/sde, SCSI device
/dev/sdf -d scsi # /dev/sdf, SCSI device
/dev/sdg -d scsi # /dev/sdg, SCSI device
/dev/sdh -d scsi # /dev/sdh, SCSI device
/dev/sdi -d scsi # /dev/sdi, SCSI device
/dev/sdj -d scsi # /dev/sdj, SCSI device
/dev/sdk -d scsi # /dev/sdk, SCSI device
You can now head in to the Community Applications and search for Scrutiny. I went with the template provided by linuxserver.io, as I have frequently used their templates in the past and have never had any issues. Before you get to install the application, you will need to give it permission to access your Unraid server’s drives. To do this, scroll all the way in the container configuration, and click on Add another Path, Port, Variable, Label or Device.

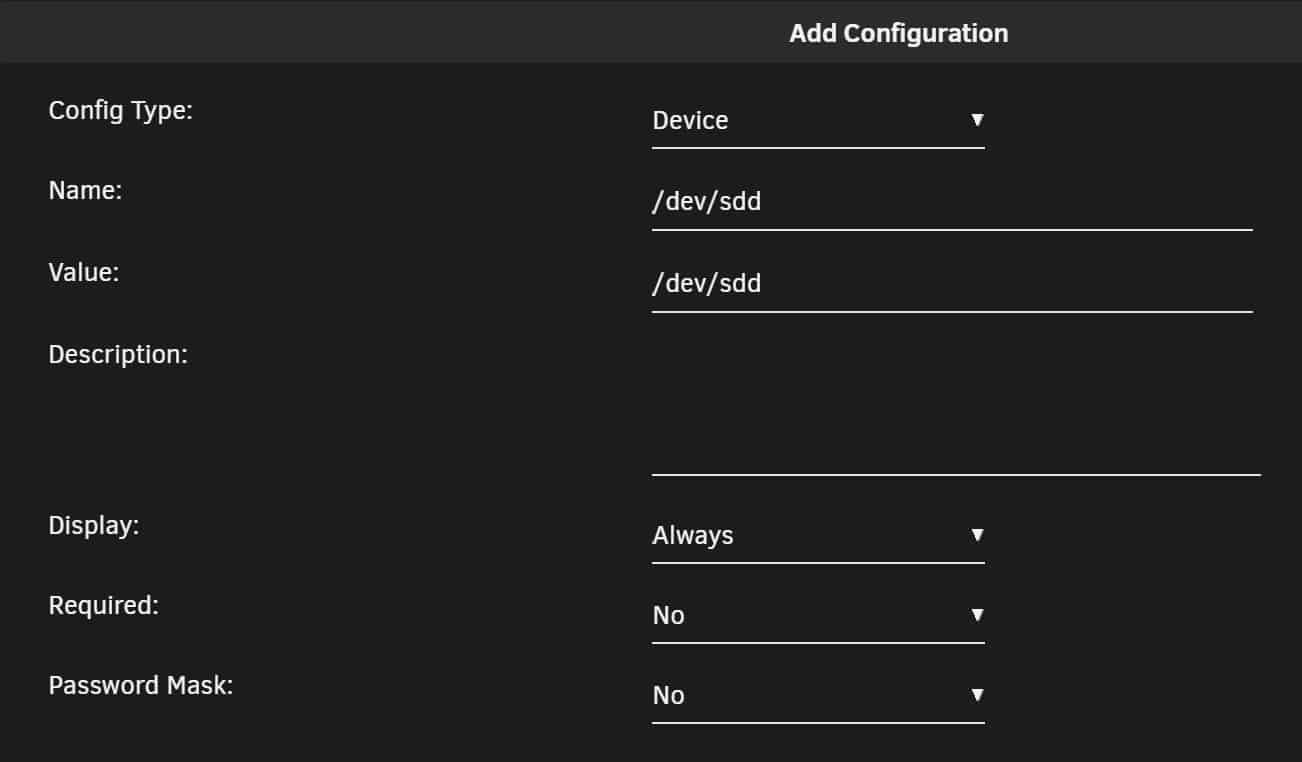
In the dialogue window that opens, add each device previously discovered in the terminal. Make sure you select the Device configuration type and always prefix the drive’s name with /dev/.
You will need to do this with each drive you want to monitor. This is one area, where the graphical interface Unraid uses to configure Docker containers will slow you down, when compared to Docker Compose.
To finish things off, you will need to map the path /run/udev. Simply enter /run/udev if you haven’t done anything out of the ordinary with your Unraid configuration.

Running the Scrutiny Docker container on Unraid
With the configuration complete, you can let Docker do its thing and install the container. If you left the port as it was, you can visit http://YOUR-UNRAID-IP:8080/ to open the Scrutiny dashboard. At this point, you might be greeted with nothing or a message informing you of the need to run a certain command.
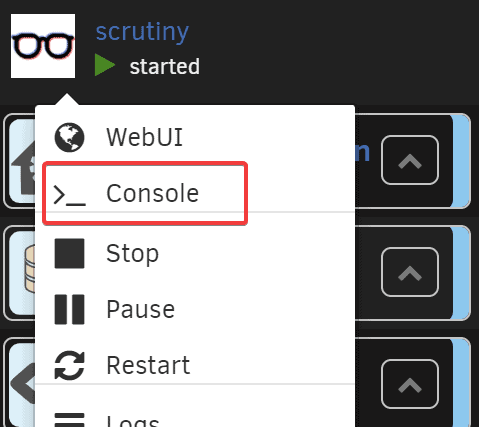
You do not have to execute this command in the Unraid terminal window, but in Scrutiny’s console. To start the console, click on the Scrutiny icon in your Unraid dashboard’s app list and select the console link. Once you are able to enter text, execute the following command:
scrutiny-collector-metrics runThe collector being executed with that command will automatically run once a day using a CRON job. All you are doing is manually executing the command, so you have got something to look at in your Scrutiny dashboard.
Using the Scrutiny dashboard for Unraid drives
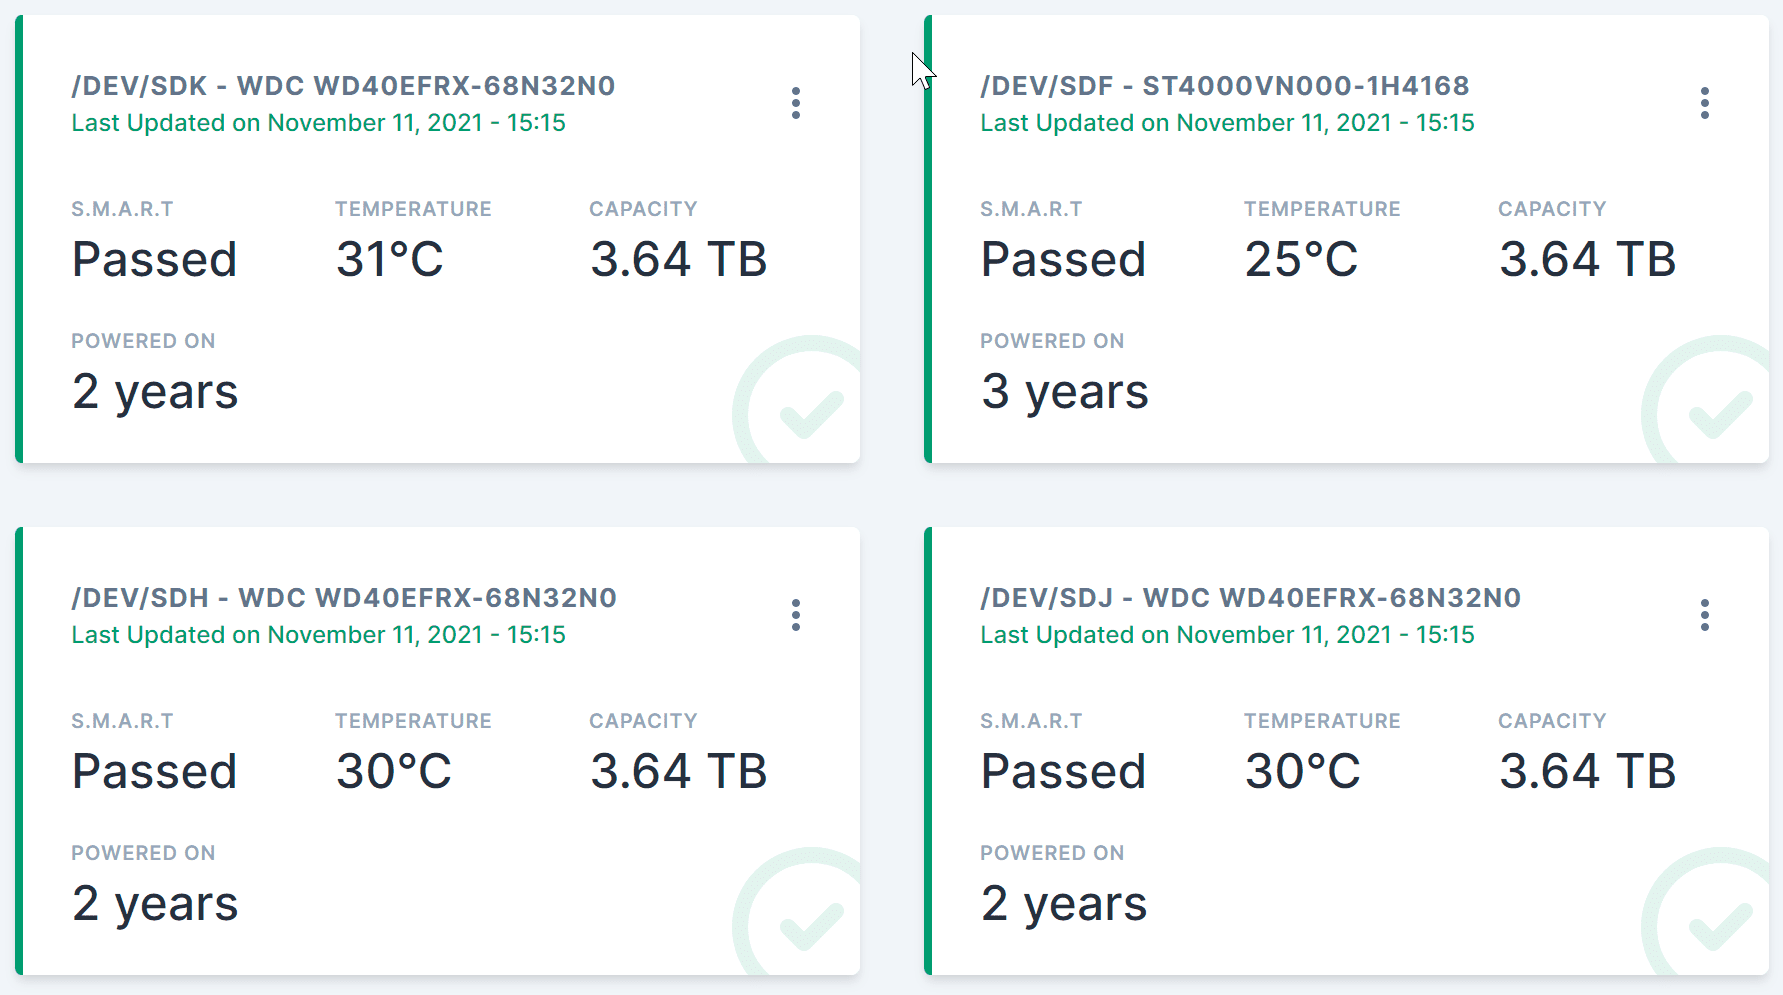
With the collector run, you will slowly see information on your drives trickling in to Scrutiny. The overview will show you basic information that is understandable to humans. Whenever you click on one of the drives, you will be presented with further information on the drive itself, such as the model, serial number, firmware version, etc. and also the history of events.
One more thing Scrutiny will do for you, is set automatic thresholds based on real-world data. It does this using the Backblaze Quarterly Report on drive failures.


